How It Works
With Shape Up, you'll be working in Cycles, delivering
Pitches consisting of one or more
Scopes, which can be broken down into individual
Tasks. Organise Pitches by Streams and add Documents
like files, links and docs you create.
1. Streams
Streams are how you organise Pitches and Resources around a topic, project or initiative. Your teams may be working on one or many streams at one time, so Pitches can be scheduled into any Cycle, whatever Stream they belong to.
1
Streams
2
Add a New Stream

3
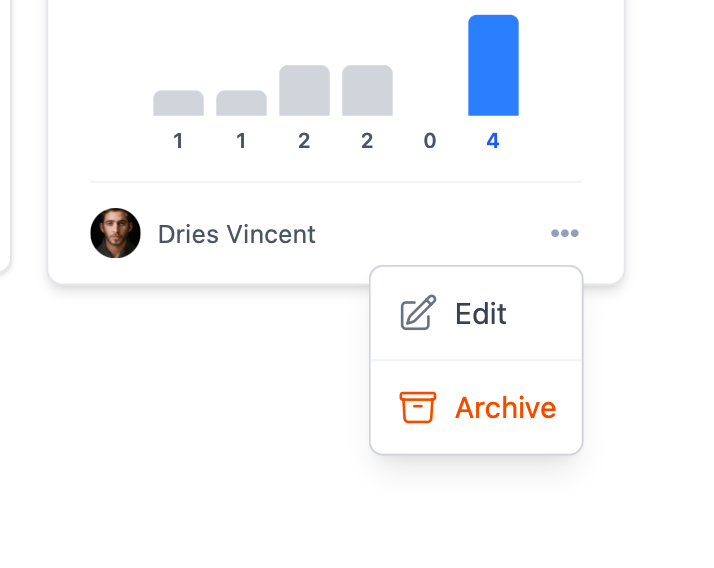
Edit and Archive
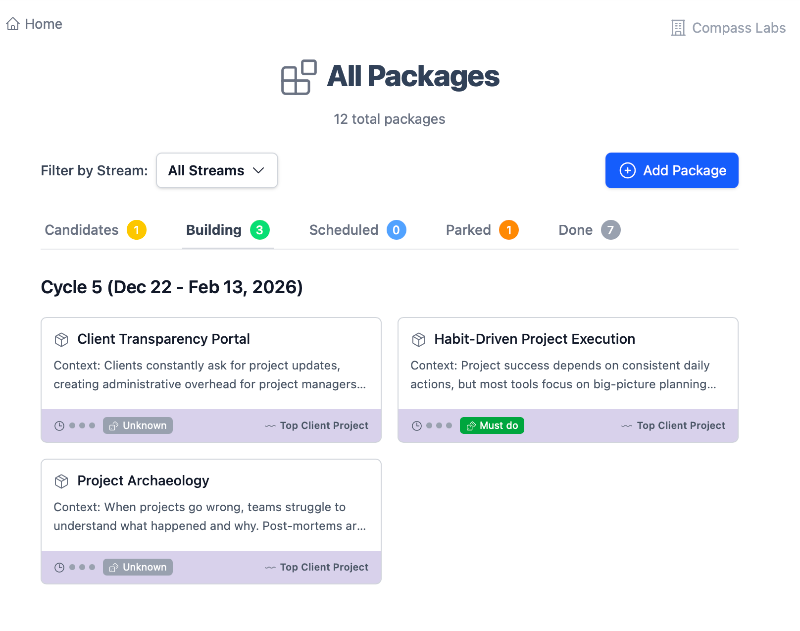
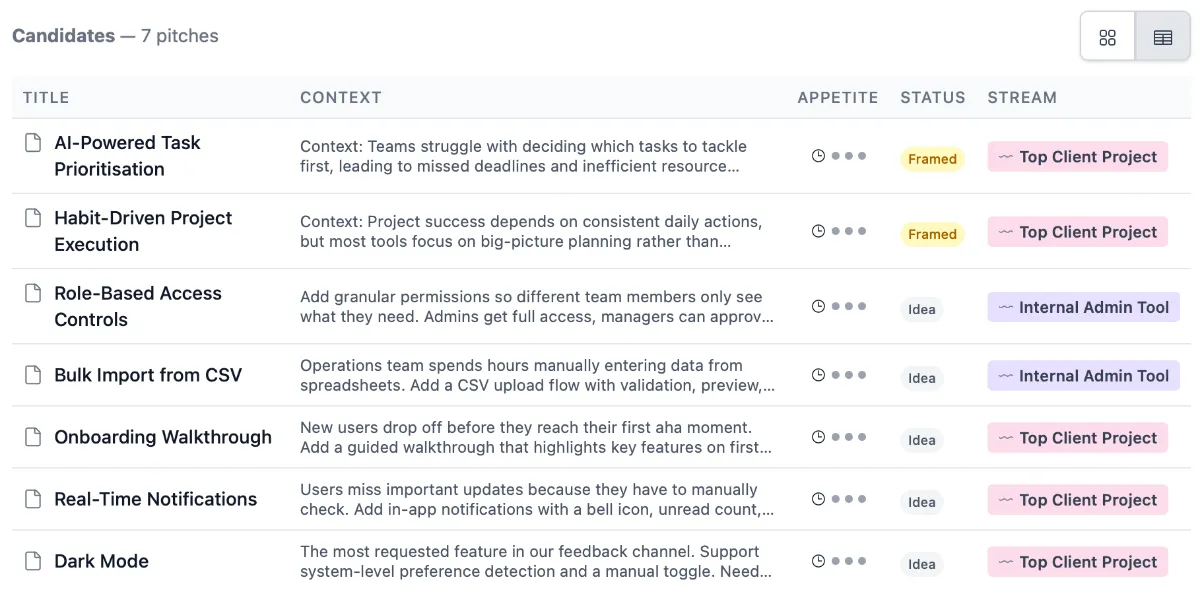
2. Pitches
Pitches are how we document our ideas and communicate across teams the problems we're solving and the solutions we're building in each Cycle. Pitch candidates start out as an "Idea", just the very basics, then we "Frame" the context and outcome we want to deliver to help prioritise. This should be enough to get buy-in at the betting table to proceed. Finally we "Shape" these prioritised frames, digging in to see what it will take to execute, what's involved and lock in what we're doing and what we're not doing.
1
Pitch Detail

2
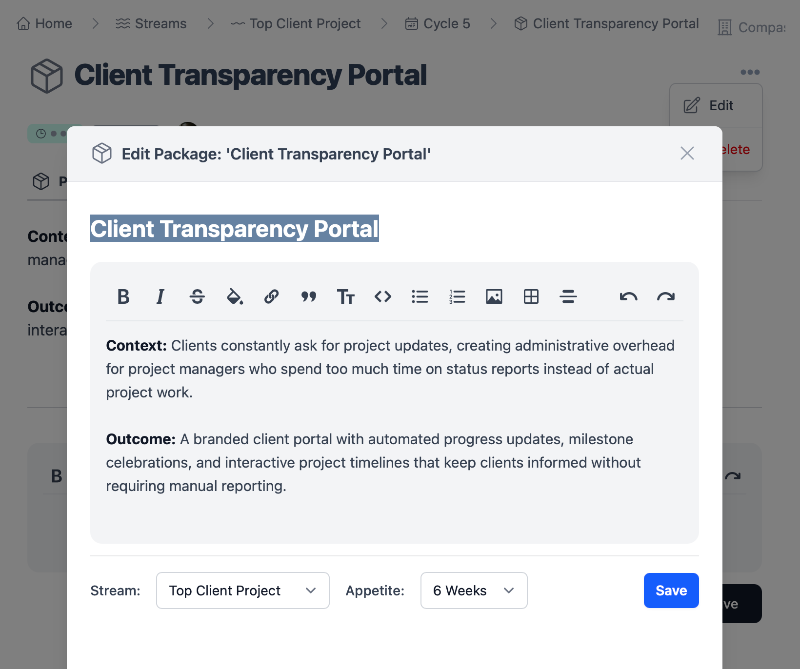
Add/Edit Pitch
3
Pitch Board
3. Documents
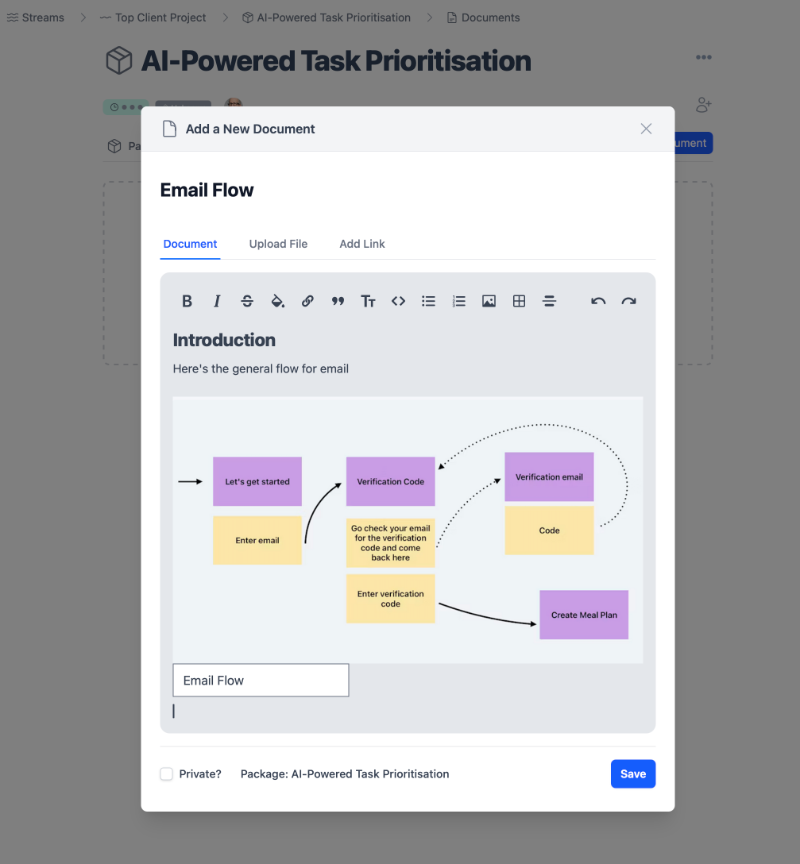
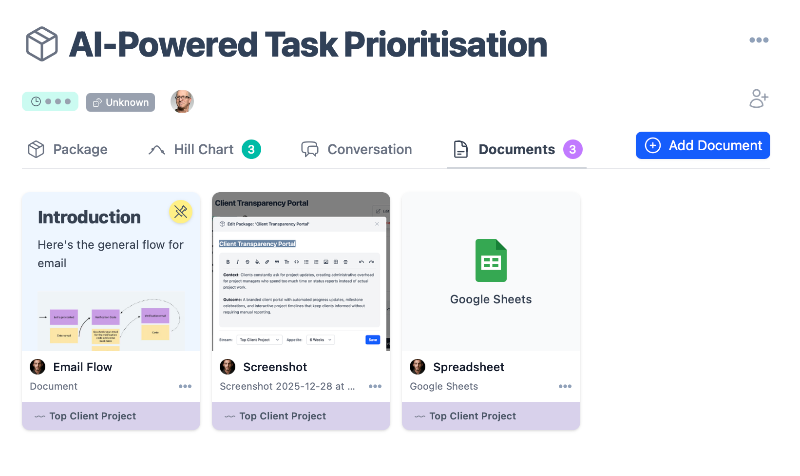
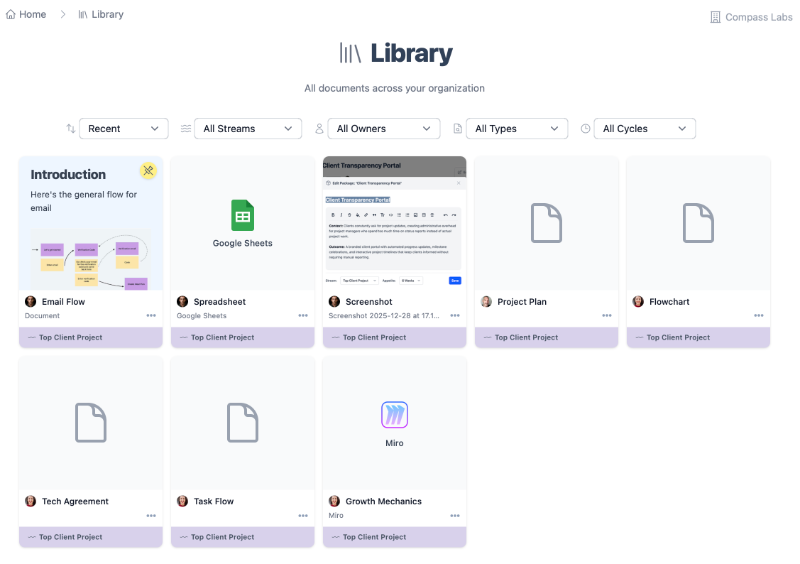
Streams and initiatives can have a lot of associated documents, screenshots, Figmas or Miro boards, Google Sheets. You can create documents inline, upload files, or links in the Stream Resources page.
1
Create Documents
2
Pitch Documents
3
Document Library
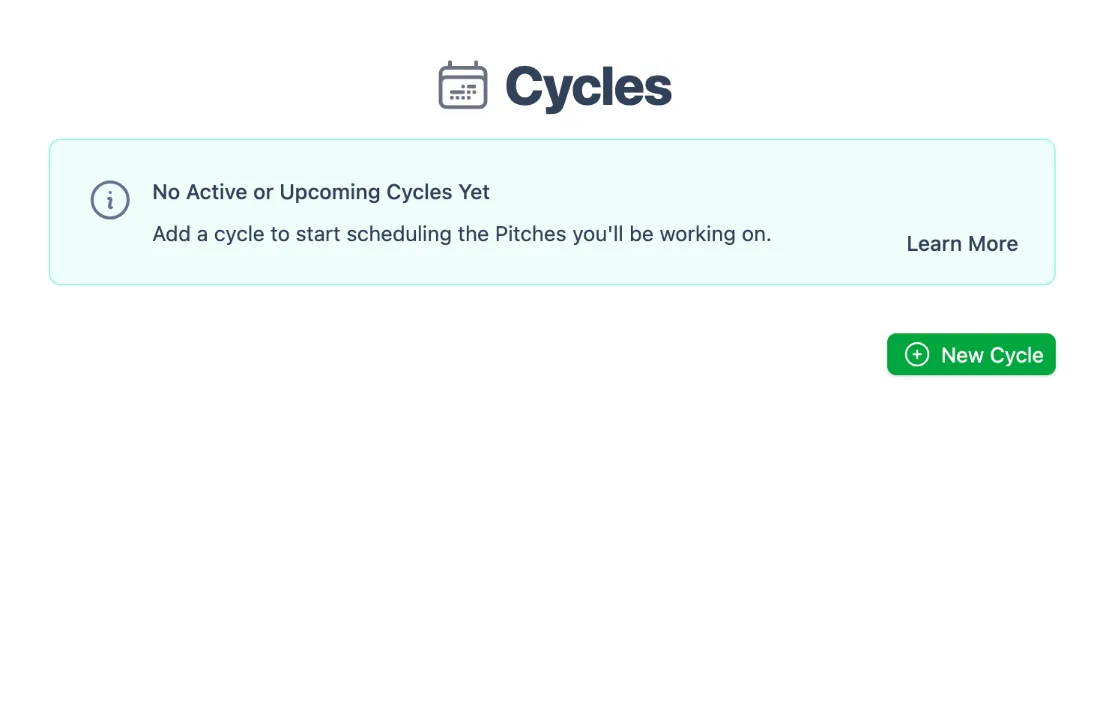
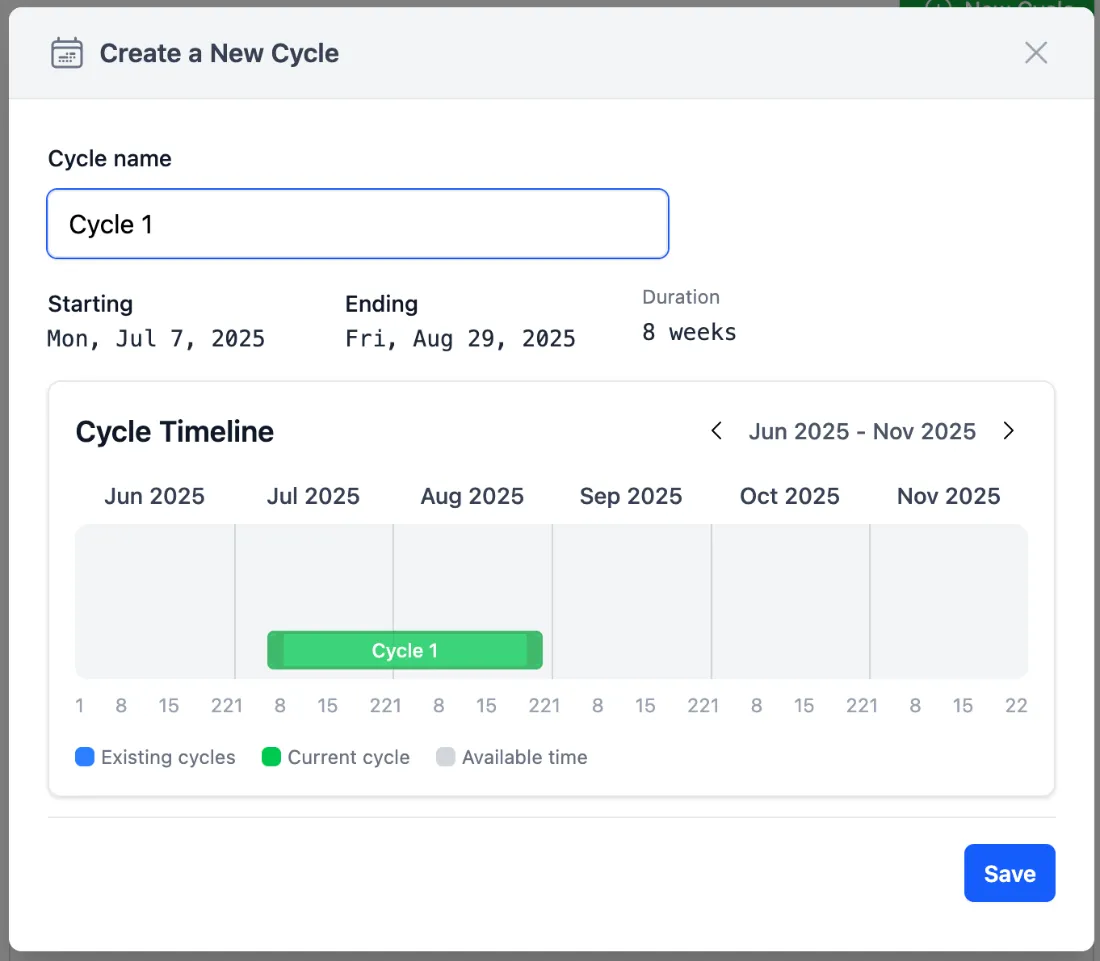
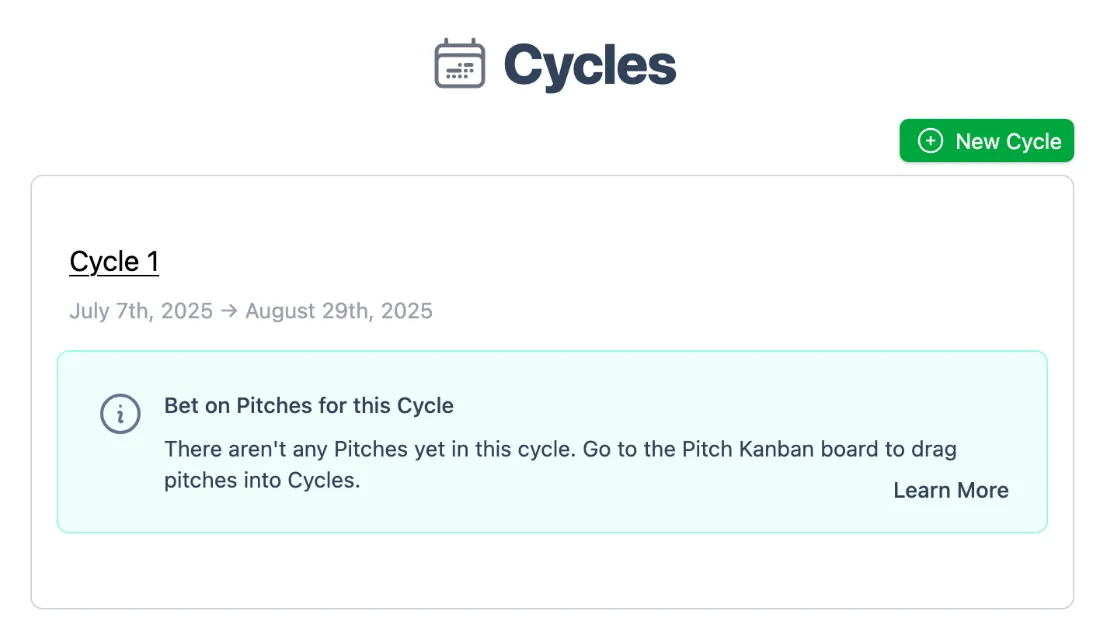
4. Cycles
A Cycle is a fixed time period during which focused and uninterrupted work is done on several selected pitches. Usually 6 weeks with a 2 week cool down. The pitches your team will be working on in each cycle are selected at the Betting Table.
1
Create a New Cycle
2
Enter Name and Set Dates
3
You Created a Cycle!
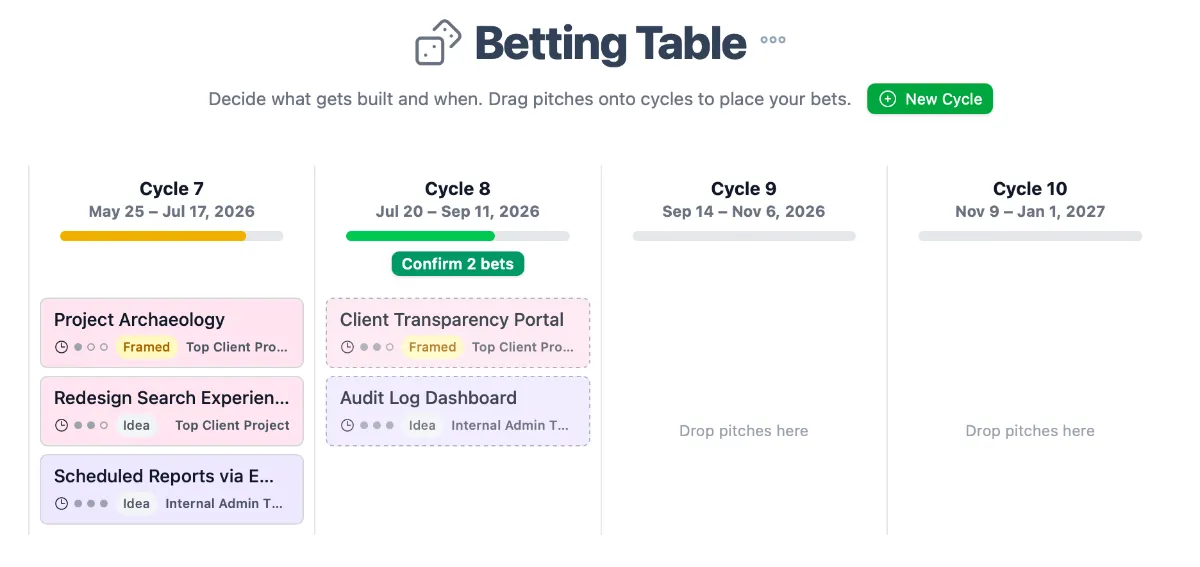
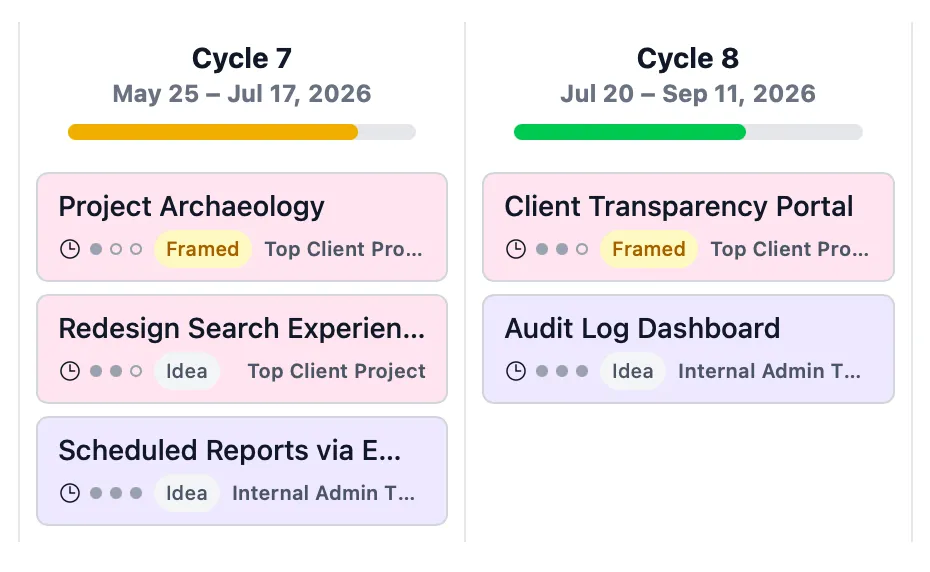
5. The Betting Table
The Betting Table is where you decide what gets built and when. Your shaped Pitches wait in the Candidates pool, and your upcoming Cycles sit across the top. Drag a Pitch onto a Cycle to place a bet - the capacity bar keeps you honest about how much you're committing. Bets stay tentative until you confirm them, so you can plan a few Cycles ahead before locking anything in.
1
Candidates
2
Place Your Bets
3
Confirm the Bets
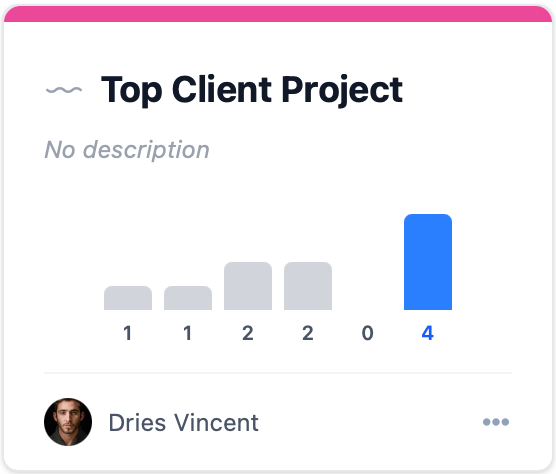
6. Hill Charts
All Pitches put in to a Cycle at the Betting Table will appear as a Hill Chart in that Cycle. Click on a Hill Chart to interact with it and build out the Scopes.
1
Hill Chart Previews

2
Bar Chart View

3
Hill Chart
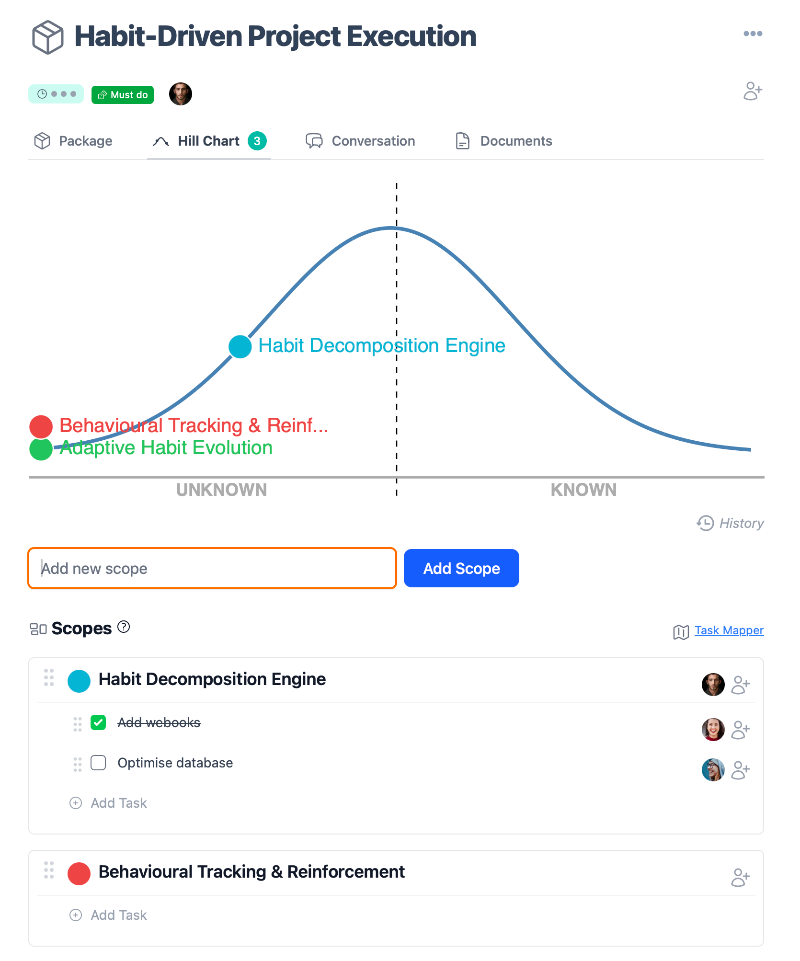
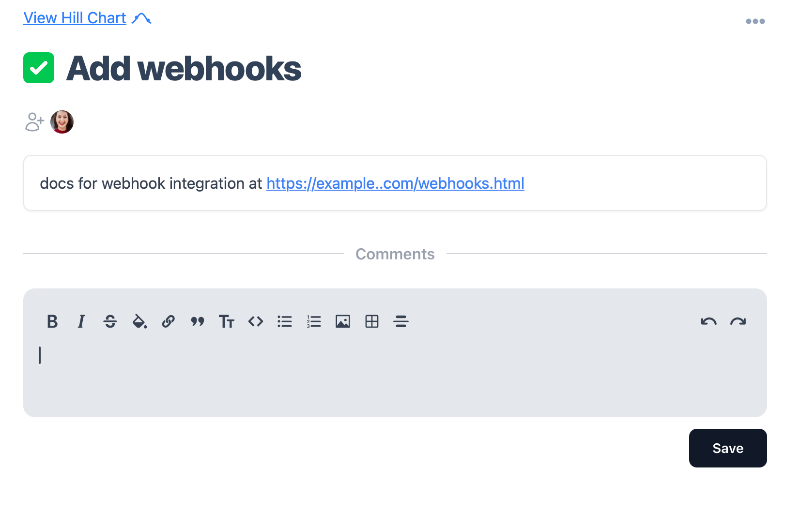
7. Scopes and Tasks
Scopes reflect the meaningful chunks of a pitch that can be completed independently and in a short period of time - a few days or less. Drag the scopes around the hill chart to mark your progress.
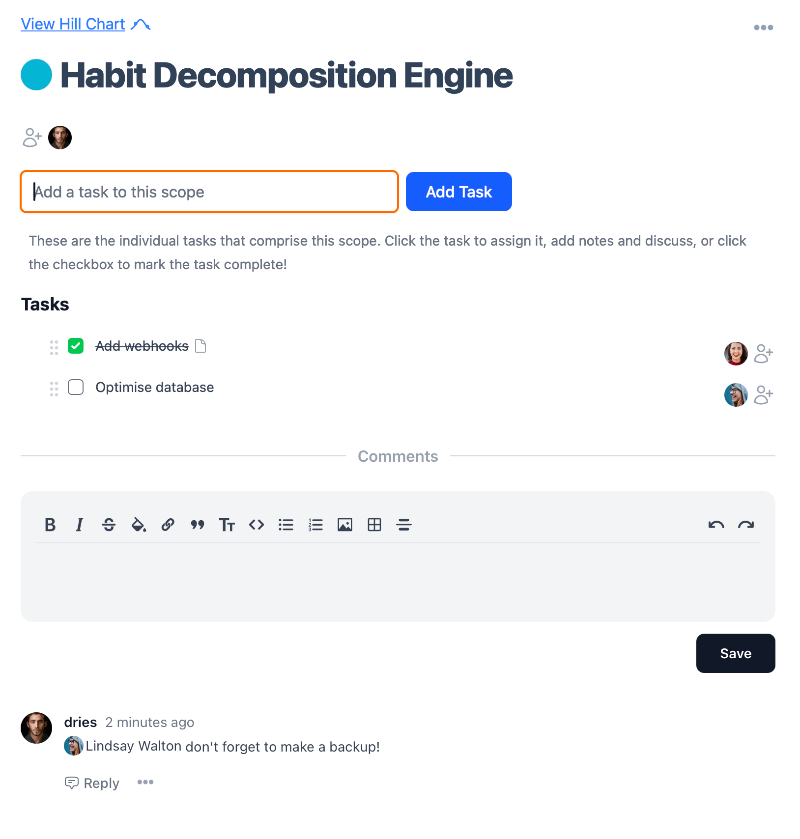
Each scope consists of one or more Tasks. Click the Scope title to add tasks. You can comment on scopes and tasks as needed to discuss.
1
Scopes
2
Tasks
3
Task Details
8. The Task Mapper
Breaking your pitch into scopes can be a challenge. You can optionally use the Task Mapper linked on the hill chart to braindump all of the tasks you can think of then organise them into groups of related tasks. These groups will become scopes in the hill chart.
1
Dump Tasks
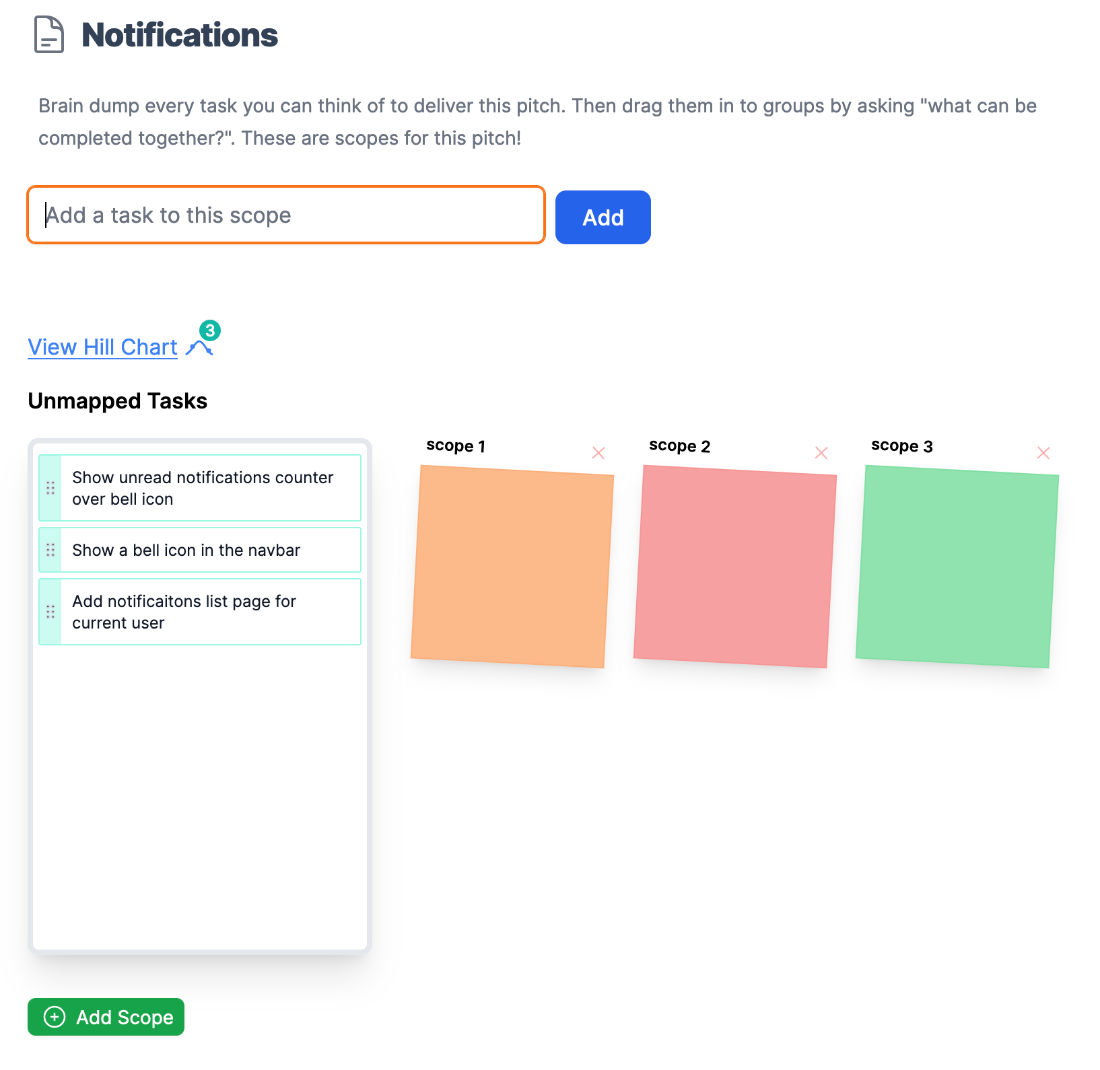
2
Organise Tasks in Groups

3
View the Hill Chart
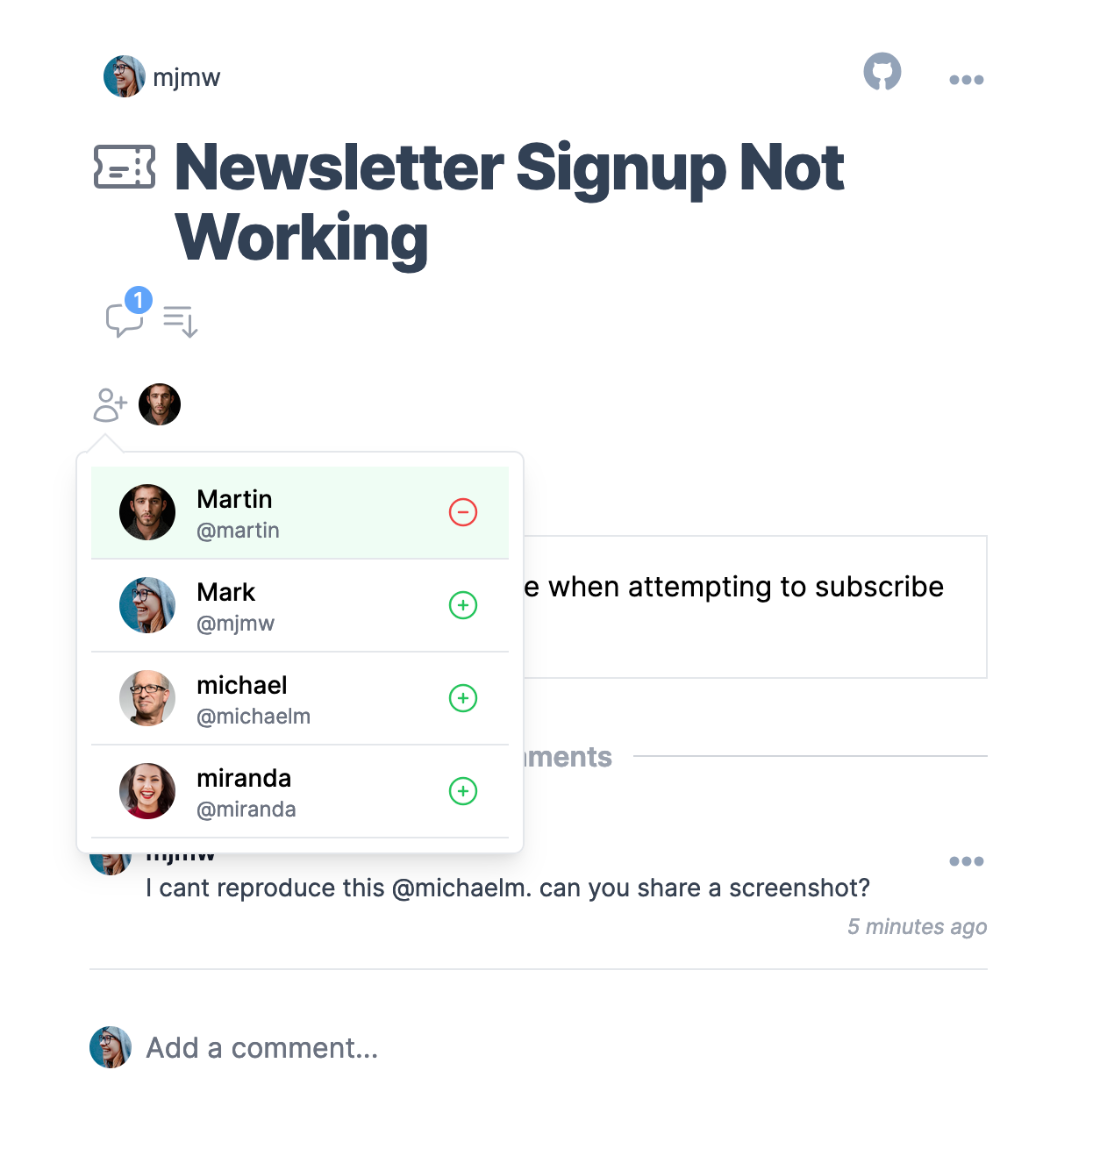
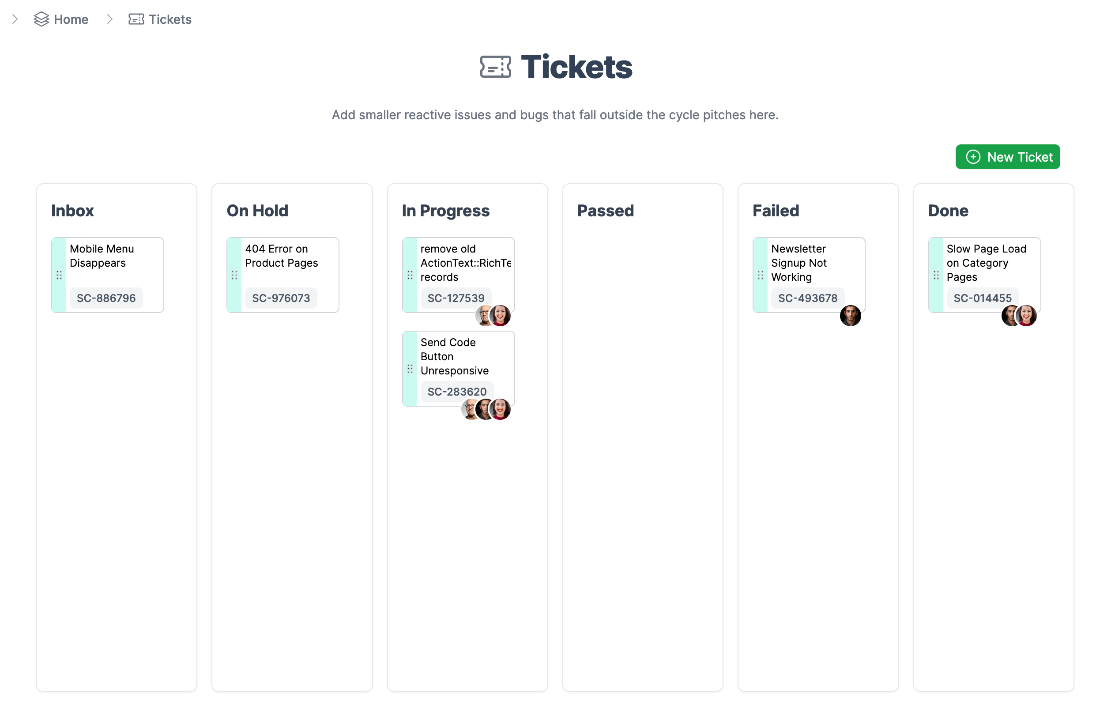
9. Issues
1
Issues Kanban
2
Issue Detail
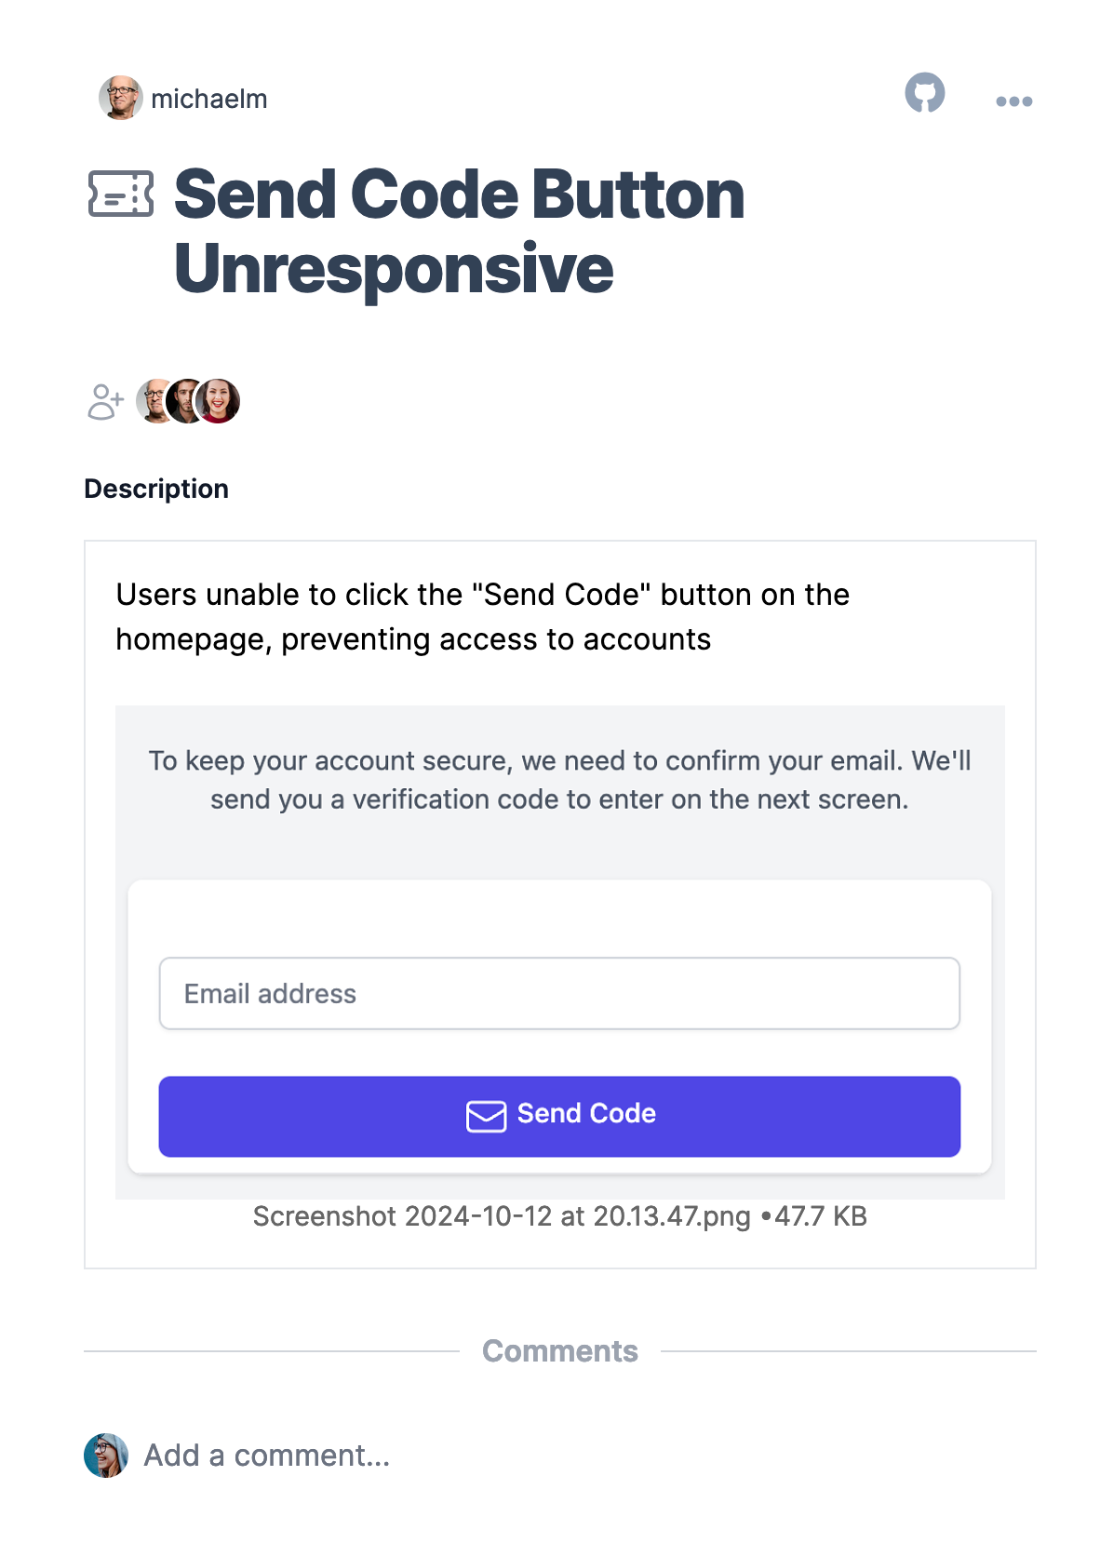
3
Issue Assignment and Comments